Monday, May 03, 2010

Sunflower and Sesame Seed Bread- May 2, 2010


Sunflower and Sesame Seed Bread

As Nick's blog post hinted, we had a busy weekend of household chores around here...mowing, planting, weeding, replacing headlights...you get the picture. That, combined with a lovely brunch at our friends' left us with a weekend of minimal cooking. I did, however, try a new bread recipe so I have a little something to share with you this Monday.

Not wanting to show up to brunch empty handed, I brought a jar of dandelion jelly and decided to bake some bread to go with it. I usually make my standard whole wheat sourdough with the sourdough starter that JJ gave me, which I love, but this gave me an opportunity to try something new. This recipe came right in my bread machine owner's manual and caught my eye because it had molasses in it. Yes, molasses, along with the sunflower seeds, sesame seeds (and cumin seeds, but I omitted because I only had powdered cumin and I thought that would be weird), white and whole wheat flour. It smelled so good while baking that I ended up making a second batch for Nick and I for the week. It bakes on the French bread cycle, so it's light and airy, which is a nice juxtaposition to the hearty flavors of the seeds and molasses.
Posted by Picasa

Saturday, May 01, 2010

Changing the headlight blub in a 1997 Honda Civic

Today's post has nothing whatsoever to do with food. It also does not have any pictures.

I'm posting a description of how to change the headlight bulb in a 1997 Honda Civic (or, more generally, a 6th generation Honda Civic). I'm doing this because (a) the Owner's Manual lacks sufficient descriptive power and (b) so do most of the online forums. My hope is that you've found this page through an internet search and are trying to figure out how to replace the headlight bulb yourself.

I'm doing this without pictures, so read carefully. Also note that I'm making up the names of various car parts, favoring a descriptive name rather than what it may actually be called.

Problem: Your 6th generation Honda Civic driver's side headlight bulb has burned out. (If your passenger-side headlight has burnt out, these directions will be about 65% helpful.)

What you will need:
  • Small- to medium-sized hands. If you have overly large hands, you may need to try a different technique than what I describe below, or may need to get more aggressive with the power steering fluid reservoir (more on that later).
  • A replacement bulb. Should cost about $10 at Napa Auto Parts. Just tell the store what Make/Model/Year you have, and they'll get you the correct bulb.
  • About 30 minutes of your time.
  • Flashlight recommended.
  • Friend recommended, to hold the flashlight and the power steering fluid reservoir out of the way.
No tools necessary.

A note on locations and directions:
To reduce confusion, I will occasionally use anatomical terms of location.
  • Anterior = front end of the car, such as the bumper, headlights, grill, etc.
  • Posterior = rear end of the car, such as the taillights, trunk latch, etc.
  • Lateral = either side of the car. In this case, it will mean the Driver's side.
  • Dorsal = top of the car, such as the roof or hood
  • Ventral = bottom of the car, the side only your mechanic sees.
  • Medial = the center line of the car, drawn from the center of the anterior face to the center of the posterior face. This is the imaginary line that is traced by the H on the front of your car when you drive.
Handedness is as you face the car head-on. For example, the Driver's side is on the Right.

Steps:

  1. Open the hood and prop it up on the hood arm.
  2. Look just behind (posterior to) the driver's side headlamp. You should see a dirty white plastic cylinder with a red knob on top, with black rubber hoses running in and out of it. This is the power steering fluid reservoir, herein abbreviated PSFR. Honda Motors put the PSFR in this location specifically to piss you off.
  3. Notice the PSFR is standing upright, thanks to a metal bracket. If you pretend that the dorsal (top) side of the PSFR is the face of a clock, and you are standing in front of your car, you will see the top edge of the metal bracket at about 10-o-clock. The PSFR is not bolted or screwed into the bracket itself. Rather, it has been slotted into the bracket from above.
  4. Pull the PSFR directly up, dorsally, sliding it up and out of the bracket. The hoses will resist. You should be safe from ripping or tearing the hoses out of the PSFR as long as you pull up the PSFR just enough to get it out of the bracket.
  5. Position the PSFR with the ventral side (bottom) of the PSFR on top of the bracket itself. This should keep it from slotting back into the bracket, and will give you a chance to think about the next steps. It may flop forward, and that's OK for now.
  6. Look or feel for the black plastic electric connector (BPEC) that plugs into the posterior end of the lightbulb. The BPEC is approximately a cube, and has wires running out of the ventral (bottom of car) face. You will probably need to try multiple angles of attack to get your hand into position to feel for the BPEC. I found that it was easiest to put my hand in from the left side of the headlight assembly (aka, the medial side).
  7. The BPEC is clipped into place thanks to two tabs that are part of the BPEC itself. The two tabs are basically imperceptible by touch, but they are there. One tab is on the medial face of the BPEC (that is, the face that is facing the centerline of the car, towards the engine block). The other tab is on the lateral face of the BPEC. Theoretically, you just pinch the BPEC on the medial and lateral sides to release the tabs, and pull it away from the bulb. Theory is not reality with your 6th generation Honda Civic.
  8. The trick to extract the BPEC from the bulb is to recognize that you likely cannot simultaneously pinch both tabs at the same time. Unless you have tiny, tiny hands.
  9. Using your right hand, hold the PSFR out of the way, in a dorsal and posterior direction from the headlight. I used the top of the bracket as leverage so that I was basically just pushing the PSFR posteriorally. This is where it's handy to have a friend.
  10. Using your left hand, apply pressure to the lateral side of the BPEC and pull it medially and "away" (posteriorally) from the bulb. I found that I can pull on the lateral side of the BPEC with the tip of my left index or middle finger.
  11. Then, apply pressure to the medial side of the BPEC, so that you are pushing it laterally and "away" (posteriorally). I was able to use my left thumb.
  12. Repeat the prior two steps in quick succession, over and over. Basically, you are trying to wiggle the BPEC out and away from the bulb. You will eventually succeed.
  13. Congrats, that was the first hard part.
  14. Next, you will need to remove the big black rubber ring (BBRR) that surrounds the posterior end of the bulb itself, like a doughnut. It is just wedged into place over a circular plastic lip. Wiggle it off in a posterior direction. There are tabs and other features you can pull on, but just grab onto any part of the BBRR to wiggle it off. This is the easy step.
  15. Your next obstacle is a stiff metal wire that acts as a gate to hold the bulb in place. This is where it is handy to have a clear mental image of what the wire is, and how it is configured. The wire is basically a gate that uses tension to push the lightbulb in an anterior direction, holding it in place. Like a gate, the wire has a hinge on one side, and a lock on the other side. The "door" part in this gate metaphor is just the wire itself, which is pushing against the posterior end of the bulb.
  16. The Hinge is on the lateral side of the lightbulb housing. The Lock is on the medial side of the lightbulb housing. Basically, you want to somehow unlock the wire, so that it swings on its hinge away from the bulb in a posterior and lateral direction (because the hinge is on the lateral side of the bulb).
  17. Therefore, the part of the wire you need to focus your attention on is the Medial end of the wire. That is, the part of the wire that is attached to the medial side of the light bulb housing. Stick your fingers into the round plastic housing of the lightbulb, and feel for a "U" shaped wire structure -- it will be on the medial side of the circular housing. In other words, if you are staring directly at the front of the headlight, looking at the lightbulb on-end, the U feature will be at 9-o-clock. The round part of the U will be pointing medially, and the two "ends" of the U will point laterally. This U structure is intended to provide you with some surface area to push on. This is the part of the wire you'll be pushing on to unlock the gate.
  18. But how do you unlock the gate? You need to visualize the lock as being like a safety pin. It uses the tension in the wire itself to stay in a kind of plastic trap, and you need to figure out which direction to push on the wire to unhook it, just like you would a safety pin.
  19. But which direction? Push anteriorally (towards the front end of the car, applying even more tension to the bulb), and move it dorsally (top of the car) out of the trap. You may need to try variations on this maneuver, but the general idea is that you push anteriorally and then move dorsally (while still pushing anteriorally). This is the hardest part. EDIT: In reading how others have described this step, it is possible you just need to pinch the ends of the U shape together to unlock it. I am not going to bother verifying this, but you might want to try this technique as well.
  20. The wire gate should spring open, releasing the bulb. Just pull the bulb out in a posterior direction.
  21. Time for a beer.
  22. At this point, you are ready to put the new bulb in. You basically just follow the above steps in reverse. I'm not going to write that out step-by-step for you, because the most important thing is that you have a mental image of how this works, which you should have by now. However, some things to keep in mind:
  • Don't touch the "bulb" part of the new bulb with your fingers, as the oils from your fingers will shorten the longevity of the bulb. At least, that's what everyone says. I'm not sure if it's true, but this process was annoying enough that I wouldn't want to risk it.
  • Be sure that the wire gate is "open" when you put the bulb in. Otherwise, you won't be able to push the bulb in all the way.
  • When you put the bulb back in, align it appropriately before locking the wire gate. The prongs are wide and flat, and form a 3-sided box. You want the missing forth side to be on the bottom (ventral side).
Hope this helps ... comments and improvements welcome.

Keywords: replace 1997 Honda Civic headlight lightbulb replacement torment hell

Friday, April 30, 2010

Happy Friday! - April 30, 2010

Happy Friday Everyone! I didn't make any treats today. Instead I enjoyed a big smear of dandelion jelly on some whole wheat sourdough toast and called it a week. I hope you all have great weekends. Next week our CSA deliveries start...Yay!

Thursday, April 29, 2010

Omelette Burritos - April 27, 2010


Sauteed Mushroom, Onion, Tomato and Spinach Burrito with Chihuahua Cheese

As I was making these the other night, I realized the ingredients were more traditional in an omelette than a burrito, but what's good for the goose is good in a tortilla (or something like that), right? And these were super yummy. I used olive oil in the pan and started the onions first, adding the mushrooms next, followed by the spinach and at last the tomatoes (we have a can open in the fridge that I'm trying to use up), sauteeing for about 3 minutes after each addition. Right in the middle of this process I also tossed in the last sad bit of left over proseco from our Easter mimosas. I though it would be a good use for it. I seasoned with oregano, salt, pepper and some smoked Spanish paprika. We tossed this mix onto some flour tortillas and topped with some Chihuahau cheese that I had grabbed at the co-op a few days ago. Did I say that this was yummy? This is my kind of comfort food.
Posted by Picasa

Wednesday, April 28, 2010

Dandelion Jelly: Resolved - April 28, 2010


Dandelion Jelly, Take 2

Alright, Dinner Clubbers, I think I finally have this resolved. This is my second batch of dandelion jelly. I ended up using a mash-up of three different recipes which can be found here, here, and here. The first was my inspiration, beautiful and romantic jelly made from sunny yellow weeds. The next two I consulted after my first batch failed to set (due to an unfortunate pectin mistake on my part) as a means to triangulate the proper ratio of pectin to juice. I particularly appreciated recipe number three due to it's accurate description of the time involved in cleaning and removing the unwanted green bits from the dandelion petals. This is not a ten minute task, my friends.


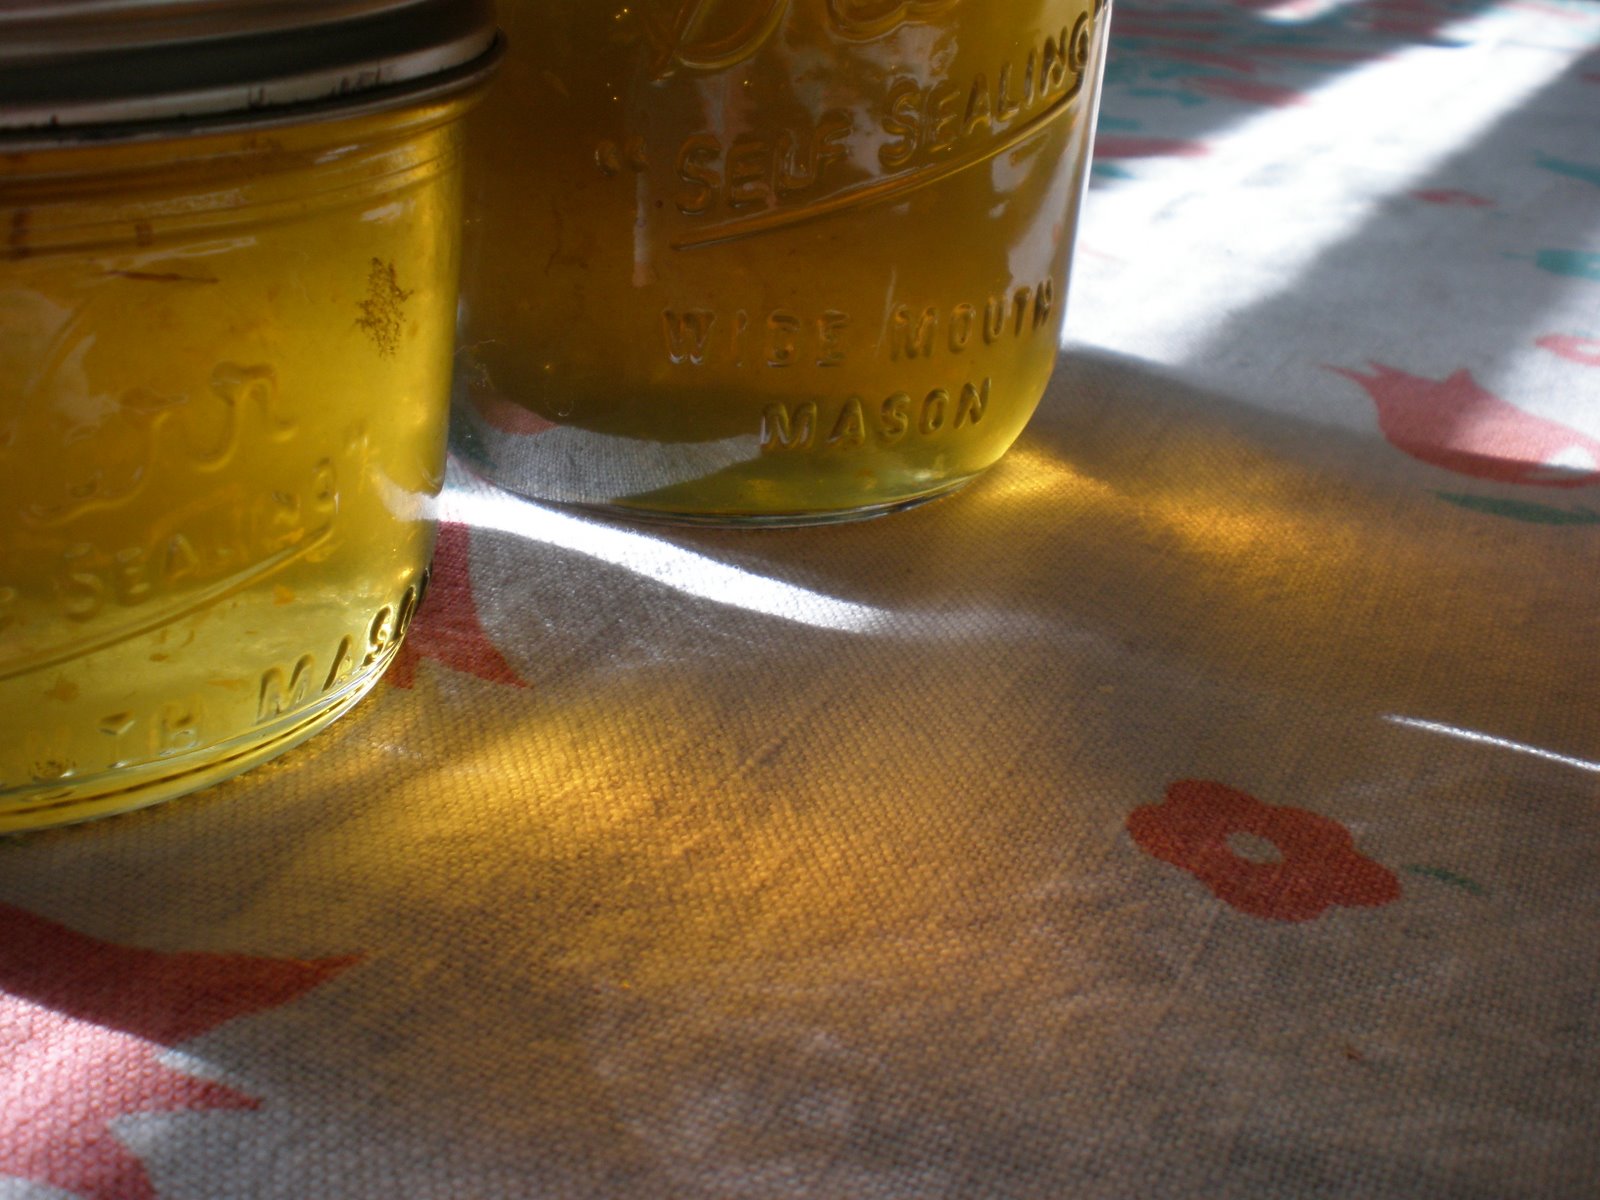
So, to outline my steps, after picking, washing and cleaning the dandelions, I boiled them in 8 cups of water for 10 min and let this mixture cool. I covered it and refrigerated overnight. The next morning, trying desperately not to be dissuaded by the greenish-black color of the liquid, I strained out the petals. I then measured out three cups, and three cups only (I was a bit confused by this direction at first, hence the third recipe to confirm) of this dandelion infused water and added my lemon juice and grated lemon zest, which is what you see suspended in the jelly, and a full 1.75 g package of powdered pectin. This mixture I brought to a boil, stirring to help dissolve the pectin. After I had a steady rolling boil, I added my sugar (I ended up using 5 1/2 cups of plain white sugar), and stirred to dissolve. Once this came back up to a rolling boil, I waited a minute and a half and then removed from the heat. Next I filled my jars, extremely relieved to see a lovely golden color and not something that looked like vegemite, and sealed them in a hot water bath for 5 minutes, and let cool for 24 - 36 hours.

My end product still is not set as firmly as I would have liked, but it tastes good and has significantly more structure than my first batch. I also have another 3 cups of that greenish-black dandelion water left over. I'm not sure if it will go towards another batch (third one's the charm?) of jelly, or if I will try my hand at dyeing some yarn or fabric with it. To be determined...

Thanks for sticking with me on this one guys!
Posted by Picasa

Brats! - April 26, 2010


Grilled Brats on Homemade Whole Wheat Buns with Apple and Manchego Salad

Hurrah! First brats of the season. I picked these up last week at the co-op on sale. I was going to pick up buns at a non co-op store while on an errand, but I couldn't find any without high fructose corn syrup in the ingredient list. So, I made up a batch in the bread machine using half white and half whole wheat pastry flour. They really didn't take that long...which is to say that I still had 3 hours before dinner to make them. I'm glad I did since they always taste exponentially better than store bought.

I also made this side salad modeled after one on the menu at Bar Lurcat. Nick grated the Manchego, which I recently learned is a sheeps' milk cheese from the La Mancha region of Spain ('Manchego' references 'La Mancha' for you food trivia lovers), while I matchsticked a Granny Smith apple. We tossed these two together and added some chopped fresh chives and parsley, both from the yard! A little salt and squeeze of lime juice was all we used to dress it. It was quite tasty.
Posted by Picasa

Tuesday, April 27, 2010

Spring Salad and Roast Chicken - April 23, 2010


Spinach Salad with Ramps and Fava Beans Accompanied by Roast Chicken

Due to my preoccupation with dandelion jelly (my second batch is cooling and hopefully setting...I have a good feeling this time), I am behind on meal posts. This is one leftover from last Friday. Much to my delight, the co-op had some Minnesota-foraged ramps last week. I grabbed some, ecstatic at finding some local green things at last. A little further down the aisle, I spied a big basket of Wisconsin-grown spinach. Along with the spinach, I grabbed a handful of fresh fava beans (their tag didn't specify a location, but I'm guessing they were from a little farther away) and this spring salad was born.

I removed the beans from their pods and cooked them for 5 min in boiling water. I chopped the ramps and tossed them, the beans, and the spinach together, dressed with olive oil and balsamic vinegar and seasoned with a healthy amount of grated Pecorino-Romano, a pinch of salt, and some freshly ground pepper. It made me very happy! Next week we get our first CSA delivery and I am hoping that these salads will soon be showing up regularly. We paired the salad with some of the roast mustard-garlic chicken we had left over from an earlier meal.
Posted by Picasa

Monday, April 26, 2010

Dandelion Jelly Update - April 25, 2010


Epic Fail

Dandelions are proving to be more cunning than initially thought. My jelly project turned out to be a complete failure, with none of the jars even coming close to setting. Sadly, the jelly-that-never-was needed to be poured down the sink.

This is where my stubbornness comes into play. I have identified the problem as using the wrong variety of pectin. When I cross checked additional recipes, I found that they all called for powdered pectin, while I used liquid. Luckily, my yard has produced another fresh batch of dandelion flowers and I am in the process of starting over using this recipe. The weeds may have won this battle, but I have every intention of winning the war.

Lessons learned: always double check the type of pectin; never post before a project is successfully completed; and never trust a dandelion.

Stay tuned.
Posted by Picasa

Friday, April 23, 2010

Dandelion Jelly - April 23, 2010


Work in Progress...

Happy Friday everyone. I had intended to have a complete treat for you today, but I failed to read the step in the recipe that says 'refrigerate overnight.' Regardless, I thought I'd show you what I'm cooking up. I found a recipe for dandelion jelly a few weeks ago from an amazingly lovely blog called 'Yummy Supper.' I have been at war (the organic kind...no poisonous chemicals were utilized) with my dandelions the past several years, but this idea made me change my tune. Perhaps it was time to make jelly, not war. That said, I collected at least 365 dandelions from the front yard today, thoroughly cleaned them, and boiled them with water and Meyer lemon juice. I am not kidding you when I say it looks like a bowl of sunshine. This concoction is currently sitting in my refrigerator, just chilling. Tomorrow I plan to add the sugar and pectin and get this jelly where it belongs...on my toast. I'll post pictures of the finished product either this weekend or Monday.

Thanks so much to Yummy Supper for posting such a fun recipe!
Posted by Picasa

Thursday, April 22, 2010

Cauliflower Curry - April 21, 2010


Cauliflower and Chickpea Curry with Baby Peas

We made this quick curry last night with a whole head of cauliflower. We also decided to throw in some chickpeas and baby peas from the freezer. We added some canned whole tomatoes and juices to the mix and seasoned with garam masala, Penzey's Maharajah Curry Powder, minced fresh garlic and salt to taste. I pan roasted the cauliflower first to crisp up the edges and then threw in the rest of the ingredients and let everything simmer together for about 15 min. We both thought this had a great flavor. Some homemade naan would have been perfect to accompany, but I still haven't gotten to that project.

Did anyone else watch "Food Inc." on PBS last night? I thought it covered some fascinating topics. It certainly reinforced my commitment to be an informed consumer. We consumers, after all, are a powerful group in this capitalistic society.
Posted by Picasa

Wednesday, April 21, 2010

Sunchoke and Cabbage Pizza - April 20, 2010


Roasted Sunchoke and Savoy Cabbage Pizza

I had dog-eared this recipe in Food & Wine a few weeks back. It caught my eye because of the sunchokes. Combine one of my favorite veggies in a pizza and mark it as staff favorite, and it's going to get my attention. It was also one of the rare occasions where I followed directions to the letter, with the exception of peeling the sunchokes (too much work and unnecessary for organic produce, in my opinion). Oh, and I used whole milk instead of skim because that is what I have on hand for making yogurt. Other than that I stuck to the recipe, even picking up Emmental cheese to top.

That said, this was a good pizza, but I thought it a bit bland. Nick added hot sauce to his second helping. Next time I might omit the sunchoke puree altogether and simply use olive oil and fresh herbs for the 'sauce' since the roasted sunchokes on top give it plenty of sunchoke-y flavor. I also think the cabbage and onion mix needs to be spiced up a bit. I might suggest caramelizing the onions before throwing in the cabbage to wilt. And, I would replace the vegetable oil with bacon fat, or at least some good flavored olive oil, just something to boost the flavors a bit. With a little tweaking, I think this could be an outstanding combination of ingredients.
Posted by Picasa

Tuesday, April 20, 2010

Roast Chicken with Mustard and Garlic - April 18, 2010


Mustard and Garlic Roast Chicken with Beauty Heart Radishes

Sunday evening, Nick made dinner, which is always a treat for me. He did a simple, but delicious roast chicken a la Jacques Pepin. The mustard and garlic gave this a lot of flavor. In addition to being tasty, this is also a quick recipe due to the fact that the chicken gets split down the back and pressed flat before roasting to cut down on time in the oven. For a side we utilized some of our beauty heart radishes. I had mine raw topped with the remainder of our Mt. Tam cheese and Nick roasted his following this recipe. It was a lovely Sunday supper.
Posted by Picasa

Monday, April 19, 2010

Cinnamon Sugar Doughnuts - April 18, 2010


Cinnamon Sugar Cake Doughnuts

We pulled out the 'GranPappy' again this weekend to try our hand at some basic cake doughnuts (my favorites, although Nick prefers the raised variety). This was the simplest recipe I could find. While we plan on branching out in the future, I wanted to start with plain old run-of-the-mill cake doughnuts without any extra ingredients. I always think it's a good idea to get a firm grasp on one's basics, before trying the fancy stuff. These turned out quite well I thought, especially the two I cut from the second roll-out when the dough contained a little more flour. I cut the recipe in half, which is still a lot of doughnuts for two people! We are going to have to pace ourselves on our doughnut adventures, or perhaps start quartering these recipes.
Posted by Picasa

Friday, April 16, 2010

Christmas Limas with Avocado and Bacon - April 15, 2010


Christmas Limas, Caramelized Onions, Avocado, Bacon and Mt. Tam Cheese

After an extremely boring week in the kitchen (my apologies Dinner Clubbers), new inspiration finally hit yesterday. I had picked up a bag of Rancho Gordo Christmas Lima Beans at the co-op a couple weeks ago. I was over the moon when I noticed that Linden Hills is now carrying a selection of the heirloom beans. Greg and JJ introduced us to Rancho Gordo a few years back when they were still living in the Bay Area. If you ever get a chance to try some of Rancho Gordo's beans, make sure you do! Anyway, on to dinner...


Rancho Gordo Beans

After cooking the Christmas Limas, which were almost unbelievably tasty on their own, I sauteed a bit (a slice or two) of chopped bacon until it was crispy and had rendered it's fat. I removed it to paper towels and then cooked my sliced onion in the bacon fat until lightly caramelized. Then I piled the beans into bowls, threw in the onions, a cubed fresh avocado, some Cowgirl Creamery Mt. Tam cheese (another Greg and JJ introduction), and the bacon to top everything off. A drizzle of olive oil and salt and pepper to taste finished off the dish.

It. Was. So. Good!

F.Y.I. Dinner Clubbers: Christmas Limas are also known as Chestnut Limas, and they do indeed have a hint of chestnut flavor. I also detected a taste similar to that of red kidney beans. That, combined with a starchy consistency reminiscent of a baked potato, makes these some damn good beans, and a special treat.
Posted by Picasa

Thursday, April 15, 2010

Egg and Mushrooms on Toast - April 14, 2010


Sherried Mushrooms with Poached Egg on Whole Wheat Sourdough

I'm certain I've posted this exact same meal before. As I mentioned, things have become a little boring around here in the kitchen. I made a fresh loaf of whole wheat sourdough yesterday and I don't like to waste an opportunity to use it the same day. So, this was last night's meal, incorporating the bread. A couple of things that excited me included some manchego cheese thrown on the toast prior to the mushrooms and eggs, and, perhaps the most exciting of all...fresh backyard thyme thrown in for seasoning. A visit to the co-op tomorrow might provide me with some fresh inspiration in the form of new produce.
Posted by Picasa

Wednesday, April 14, 2010

Chipotle Chickpeas and Kale - April 13, 2010


Chipotle Chickpeas and Kale with Manchego Cheese

Last night's dinner was made up on the fly. Chickpeas (pre-cooked and frozen), kale, and onions were sauteed with chipotle chilies, tomato paste, cumin, smoked Spanish paprika and a splash of red wine for good measure. I topped the bowls with shaved manchego to help take the edge off of the heat from the chipotles. It was good, but not very exciting, despite the chilies. The problem, Dinner Clubbers, is that I am quickly growing bored with our winter staples of beans and kale. I am anxious for the Mid-West to catch up, produce-wise, with the rest of the country. In three weeks (and don't think for a minute that I'm not counting the days!) we get our first CSA delivery of the season and I can't wait to inject a little freshness into our diet. I am dreaming of bowls of delicate spring greens and pickled ramps. Until then, we will continue to do the best we can with our winter pantry.
Posted by Picasa

Tuesday, April 13, 2010

Indian Tofu Scramble - April 12, 2010


Indian Spiced Broccoli and Tofu Scramble

While perusing the May issue of Food & Wine, I found a recipe for an Indian tofu scramble which sounded delicious (plus it was marked as a staff favorite...always a good sign). It utilizes cauliflower, spinach and scallions...none of which I had. But, I decided to make a version anyway using broccoli in place of the other veggies. I kept the spices the same and fudged the cooking directions when needed to accommodate my changes. It was great! I could have eaten another whole bowl if there would have been any left. Next time I want to try it with the cauliflower and spinach.
Posted by Picasa

Monday, April 12, 2010

Weekend Morsels - April 10 - 11, 2010


Sunday Breakfast

To start the week, I wanted to post a couple things we ate over the weekend. Sunday's breakfast included a perfectly ripe mango and 'homemade' poppy seed croissants. I still had a bit of the poppy seed filling left over from Easter brunch, so I decided to make some cheater croissants using puff pastry dough and rolling it around the poppy seed filling. They turned out great! I already have plans to do a marzipan version next.


Saturday Salad

We also had some iceberg lettuce left over from last week's 'retro' tacos. Nick loves those iceberg wedge salads that you can get as a side at many steak-house establishments. They served as inspiration for our version with a little homemade avocado buttermilk ranch dressing made from pureeing an avocado with juice from half a lemon, olive oil to get the right consistency, salt, pepper, and Penzey's buttermilk ranch seasoning. The iceberg lettuce was so crisp and juicy. This was a very enjoyable salad.
Posted by Picasa

Friday, April 09, 2010

White Bean and Bacon Pizza - April 7, 2010


Pizza with White Beans, Bacon, and Rosemary on Naan Crust

Wow, it's been quite a week. I am immensely happy that it is Friday today. Just to be clear, this is not the pizza we ordered last night after struggling for 10 hours learning the intricacies of replacing an original toilet in a 60 year old house. No, Dinner Clubbers, but that was some excellent pizza. This pizza is a recipe from Food & Wine using naan as a cheater crust. Sadly, this is not homemade naan, even though I learned how to make that in the class I took this winter. I will make some eventually, maybe during a week when my toilet doesn't disintegrate. This naan is from Trader Joe's. I thought this a very tasty recipe. The only modifications I made were switching the cheese, using parmesan, and subbing bacon for pancetta, since that was all we had on hand.

I hope you all have great weekends. Next week should be a a bit more normal around here. Until then, Cheers!


Posted by Picasa

Thursday, April 08, 2010

Let's Order Pizza - April 8, 2010

Sorry for lack of post friends...we had to perform emergency toilet replacement today. Everything that could go wrong did. But now, it is done. At least good enough for tonight. Needless to say, we are ordering pizza tonight. I'll be back tomorrow with a real post, I promise.

LinkWithin

Related Posts with Thumbnails